I didn't think you'd want to see my gross work outfit, so before I went shopping with my mom today, I snapped a couple pictures of what I was wearing:
A blue stone teardrop necklace I got from my mother a long time ago.
I have on a gray tank dress I got from Target (I LOVE Target) last year for about $17, and on top a pink empire waisted kimono dress, also from Target for $15.
Bangles I got from Wal*Mart for $5 four or five years ago.
A ring from thrifting and my favorite Cato flats.
Now for a tutorial of sorts:
Bird's Nest Necklace- I saw an image of one of these and knew it would be easier, and cheaper to make my own. You just need a few simple things to get started:
(Additional supplies not listed: the bird's nest is meant for a necklace, so you'll want to buy a chain (or use one you already have) and a jump ring to attach it to the chain)
This is my trusty tray of tools. You really only need the top two, the pliers and the cutters.
Next is 24 guage wire. 24 guage works best because it moves easy and holds it's shape easier than the next size up. I got a package with three different colors of wire and each spool has about 24 yards of wire on it. For this project you need about 5 feet of wire.
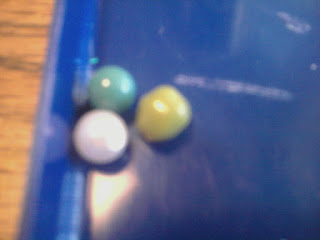
You'll also need three beads of similar size. The gold wire looks really good with the green and blue beads.
Slide the beads onto the wire to the middle, and tie it once. Tying it is just so the beads don't slide while you're circling the wire in the next step, you won't notice this when your bird's nest is finished.
Start wrapping, or circling, your wire from both sides around your beads, or "eggs". The wire creates the nest that your eggs lay in.
When most of the wire is wrapped it will look like this, there should be a few inches of wire on each side left. This wire is used to keep everything secure. Take one side and feed it through the center of the nest and wrap it around, do the same on the other side.
Use the pliers to help pull the wire nice and tight. Then use the cutters to cut off the last bit of wire. Last, use the pliers to clamp down where you have the wire wrapped around the nest to keep it in place.
And there ya go! The bird's nest is ready to be put on a necklace and worn.
(Don't feel like making your own? Want to win this one? Small Town Find's first giveaway: Open now!)
To enter: Leave a comment telling me what color beads/wire you want used to make your Bird's Nest charm. I can make anything!
Additional entries:
Tweet it!: @calli_grace #smalltownfindsgiveaway Bird's Nest Necklace tutorial on Blogger
Like the facebook page: http://www.facebook.com/#!/pages/Callis-Accesories/166684590014328 and comment on the wall about the giveaway.


No comments:
Post a Comment